Wednesday, October 20, 2010

Spooky Wreath


This is another project from last year. I took an old, faded out spring wreath and with a little spray paint, spider webs and spider rings turned it into a "spooky wreath" (imagine me saying this in a very "spooky" voice and it is way cooler).

Before

Here's the wreath after a good coat of black spray paint and my baby showing off our supplies.


Max helped me attach the webs and stick in the rings and we were good to go. Gotta love a quick and easy before and after!


Everything's Cuter with a Little Paint

I completed this project over a year ago as a birthday gift for a dear friend of mine. It was such a fun project because it involved a few of my favorite things: turquoise, my paint sprayer, chalkboard paint and twine. I am a firm believer that anything can be made cuter with a little paint and ribbon. I will eventually paint or tie ribbon on anything that sits still long enough!
After

Before

I originally bought this old window at an antique store for $5 and it had been sitting in my garage for quite a while. First, I removed the glass panes. Then I scraped and sanded all of the loose paint. I then primed the window with an oil based primer (not many progress shots, sorry!). Next, I loaded my paint sprayer with my mis-tinted Wal-mart paint and sprayed the window. When the paint was dry I distressed the wood slightly and applied glaze.

The nice man at Lowes measured one of the glass panes that I had salvaged from the window and perfectly cut me 6 wooden panes. I came home, spray panted the panes with chalk board paint and popped them into place. I secured them into place with a small amount of wood glue, but it may be necessary to add a few small nails to keep the new panes in place.

When everything was dry I tied some twine around the window, added a little piece of chalk and a birthday message and I was ready to party!

Tuesday, October 19, 2010

Dear Lily


Dear Lily,

When I look at you I have so many hopes and dreams for your life. I pray for you to stay little forever and simultaneously dream of what you will be like as a woman. I know that ours will be a bond that can never be broken and I pray that God will bless us with many years as mother and daughter. One day I will be gone. I want to make sure that when that day comes you never question my feelings and beliefs. I want for you to know where you came from...the stories, the traditions, the history. This is my gift to you.

She was voted "most talkative" in her senior class and never missed a day of work in 30 years. She would sit with me for hours as I struggled through my homework. She was honest and devoted. She was beautiful, yet frugal. She was creative and interesting. She was everything beautiful, kind, and honest. She was my grandmother, my ma-ma.

Her name was Varena Ernestine Gambrell Cooley. You were named after her mother, Lillian. She always told me not to name my children after her, "Don't do that to a child," she would say. She loved her mother, Lillian, so I decided to honor her by naming you after her mother. She was as unique as her name.

You will grow up surrounded by pictures of her as a young woman. These pictures are among some of my most prized possessions. She had green eyes and black hair--a beautiful combination. You have her eyes. The way that she dressed in these old pictures is classic and stylish. She told me that many of her clothes were handmade.

I will share many more stories of her with you. I hope that I can be to you what she was to me. What she will always be to me--my inspiration.

Love,
Mommy

Monday, October 18, 2010

Rub-ons, Paint and Pumpkins

I've really been enjoying decorating for Halloween. Tonight I completed several projects that have been floating around in my head for a while. I'm tired and short on words tonight so here goes...

My Halloween Mantel

Did you spot my painted pumpkins?

Using these for inspiration, a little black paint and Max's paint brush I created these:


This little guy is my favorite.

Next, I used this:

To make this:

Cute, right?

Things I learned tonight:

1. Painting pumpkins is not as easy as it looks.
2. When applying rub-ons to glass, forget the little wooden stick and use a plastic baby spoon...works like a charm!
3. The correct spelling for "mantel".

Question I still have: Do I need to do something to seal the rub-ons on my glass candle holder?

Nite, Nite!

Sunday, October 17, 2010

Max "Cleaned-up" His Room

Last weekend I told Max that we could decorate his room for Halloween IF he cleaned it up first. He disappeared and returned about 20 minutes later to tell me that he was finished cleaning his room. This is what I found:


After taking a closer look at his room, I realized that this job was going to take more than 20 minutes and an eager 5 year old. Although it didn't look "that bad", under the surface it was an unorganized mess. Since Lily's arrival I haven't had a lot of time to focus on maintaining the organization in Max's room and I decided to jump in head first.

First, I had Max try on all of the clothes in his closet and we packed up the ones that were too little. We ended up with two bags full of clothes to pass on to Cruz. Bittersweet.

We finished the closet, but decided to wait until this weekend to tackle the bookshelf.


Today I decided I needed to finish what we had started. Here is what I faced:


We sorted the toys into categories and placed them in their appropriate baskets. Then came the fun part...

In an attempt to create an effective organization system (and use a little chalkboard paint) I made these wooden chalkboard labels for Max's baskets.

I started with a can of chalkboard paint and some wooden slats from AC Moore ($2.19 for a pack of 6). I sprayed the slats and drilled holes on each side.


I then "conditioned" the mini chalkboards using these directions from e-how: Condition your chalkboard surface. Rub over the entire chalkboard surface with chalk. Using a felt cloth, wipe off the chalk you just applied. Then use a slightly damp cloth to wipe the chalkboard clean.

Next, I cut pieces of twine (approximately 6 inches each) and used them to fasten the chalkboard plates to the baskets.


I love how they turned out. It is such a simple and inexpensive way to add personality to your organization. Max loved them too...we plan to draw on the labels as well to help him remember what is in each basket.


Please leave me a comment if you plan to use this idea in your home. I would love to see pictures and share them here on my blog!

Saturday, October 16, 2010

It's Fall Y'all!

I love fall! It is by far my favorite season. I love the smells, the colors, the change in the weather and the clothes. It is also really fun to decorate for fall. A few weeks ago my friend and I got together to work on a few projects. A lot of laughs and a spray painted dog later here is what we had...

"Trick-or-Treat" Banner
"BOO Pumpkins"

Both of these projects were fun and simple to complete. For the banner, we started with Halloween themed scrapbook paper and a "flag" template.


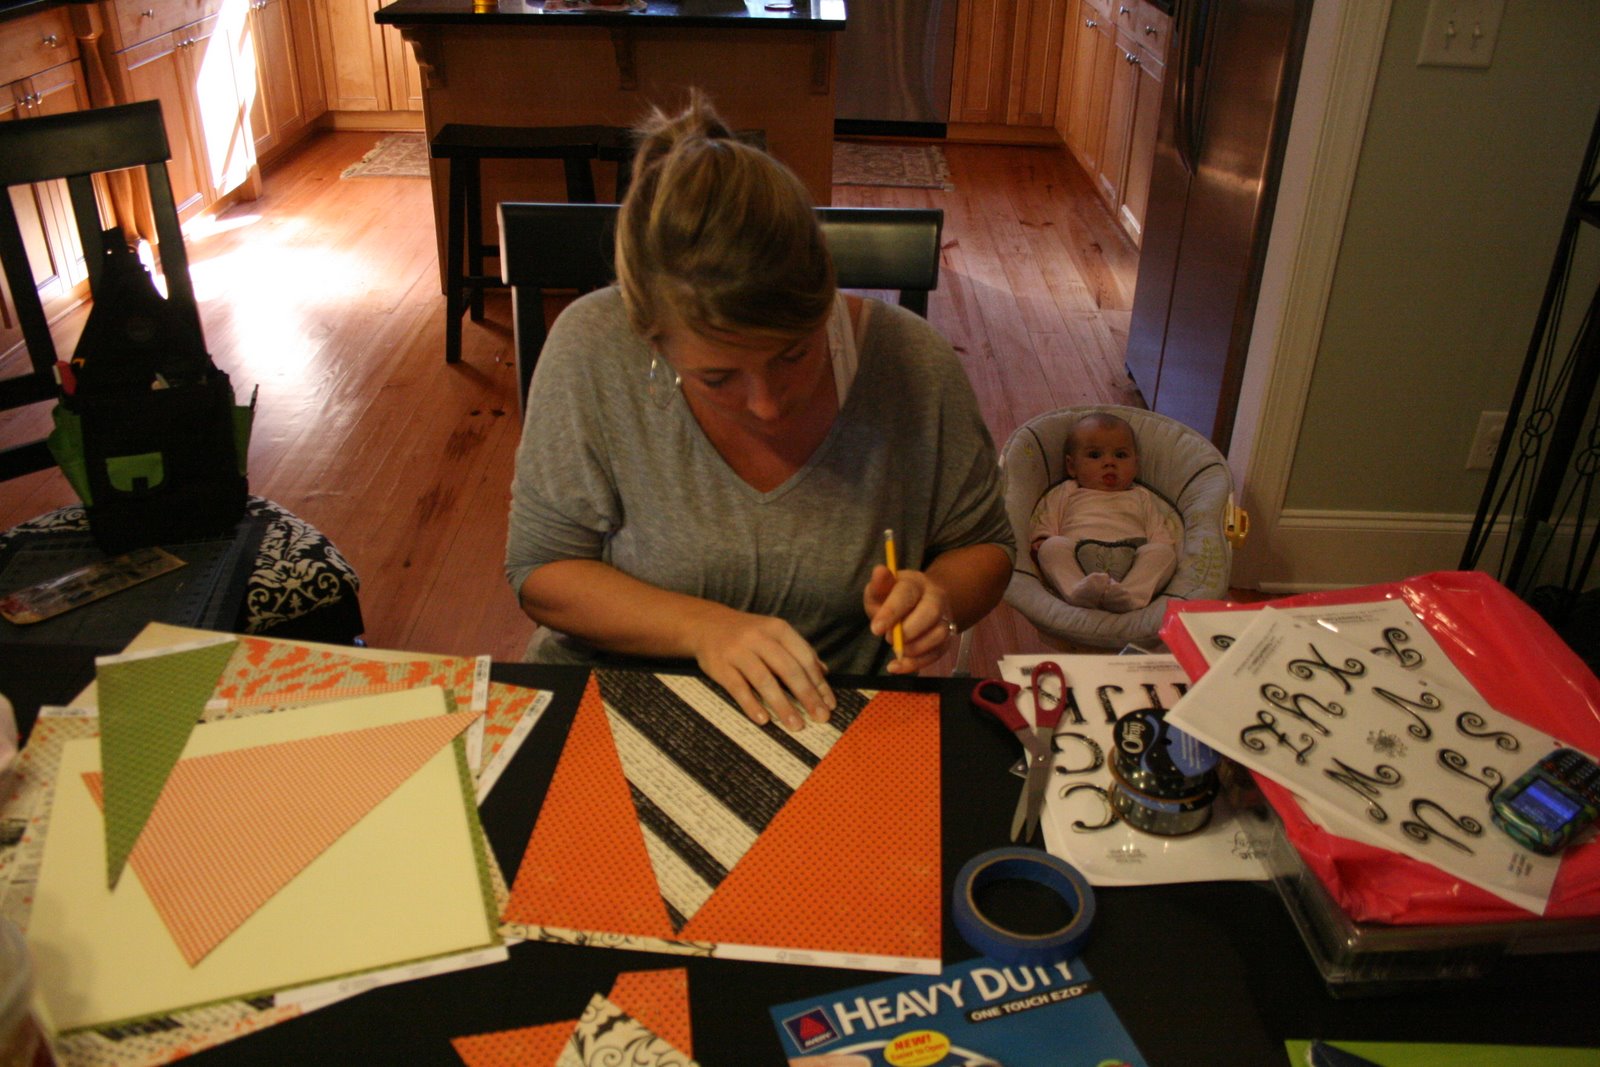
We then traced 11 flags and cut them out. (See my Lily in the background?)

Next, we arranged the patterns in the order that we wanted them to be in the final product. We cut circles out of card stock, stamped the letters with acrylic stamps, "cat-eyed" the edges of the circles and the flags and glued the circles to the flags. We also used Halloween stamps to add a little detail.


Finally, we cut slits on each corner of each flag and strung a ribbon through the slits. I hung mine in front of the mirror in my dining room.

The pumpkins were much less time consuming.
3 pumpkins...

plus a little chalkboard paint (applied 2 coats with a foam brush)...

and a little twine and ribbon...

provides a festive touch to the front porch. (Max loves it because he can "read" "BOO")
I have a few more unfinished Halloween project to finish tomorrow. I will be back soon to share!