Showing posts with label before and after. Show all posts

Tuesday, February 28, 2012

Toy Closet Part II

I found myself with a few extra minutes today to do some more work in the toy closet.

First, let's take a look at how far we have come. A year ago this is what it looked like:

Duct tape? My husband's idea of the best in organization supplies.

In an attempt to gain control of the mess I cleaned out...
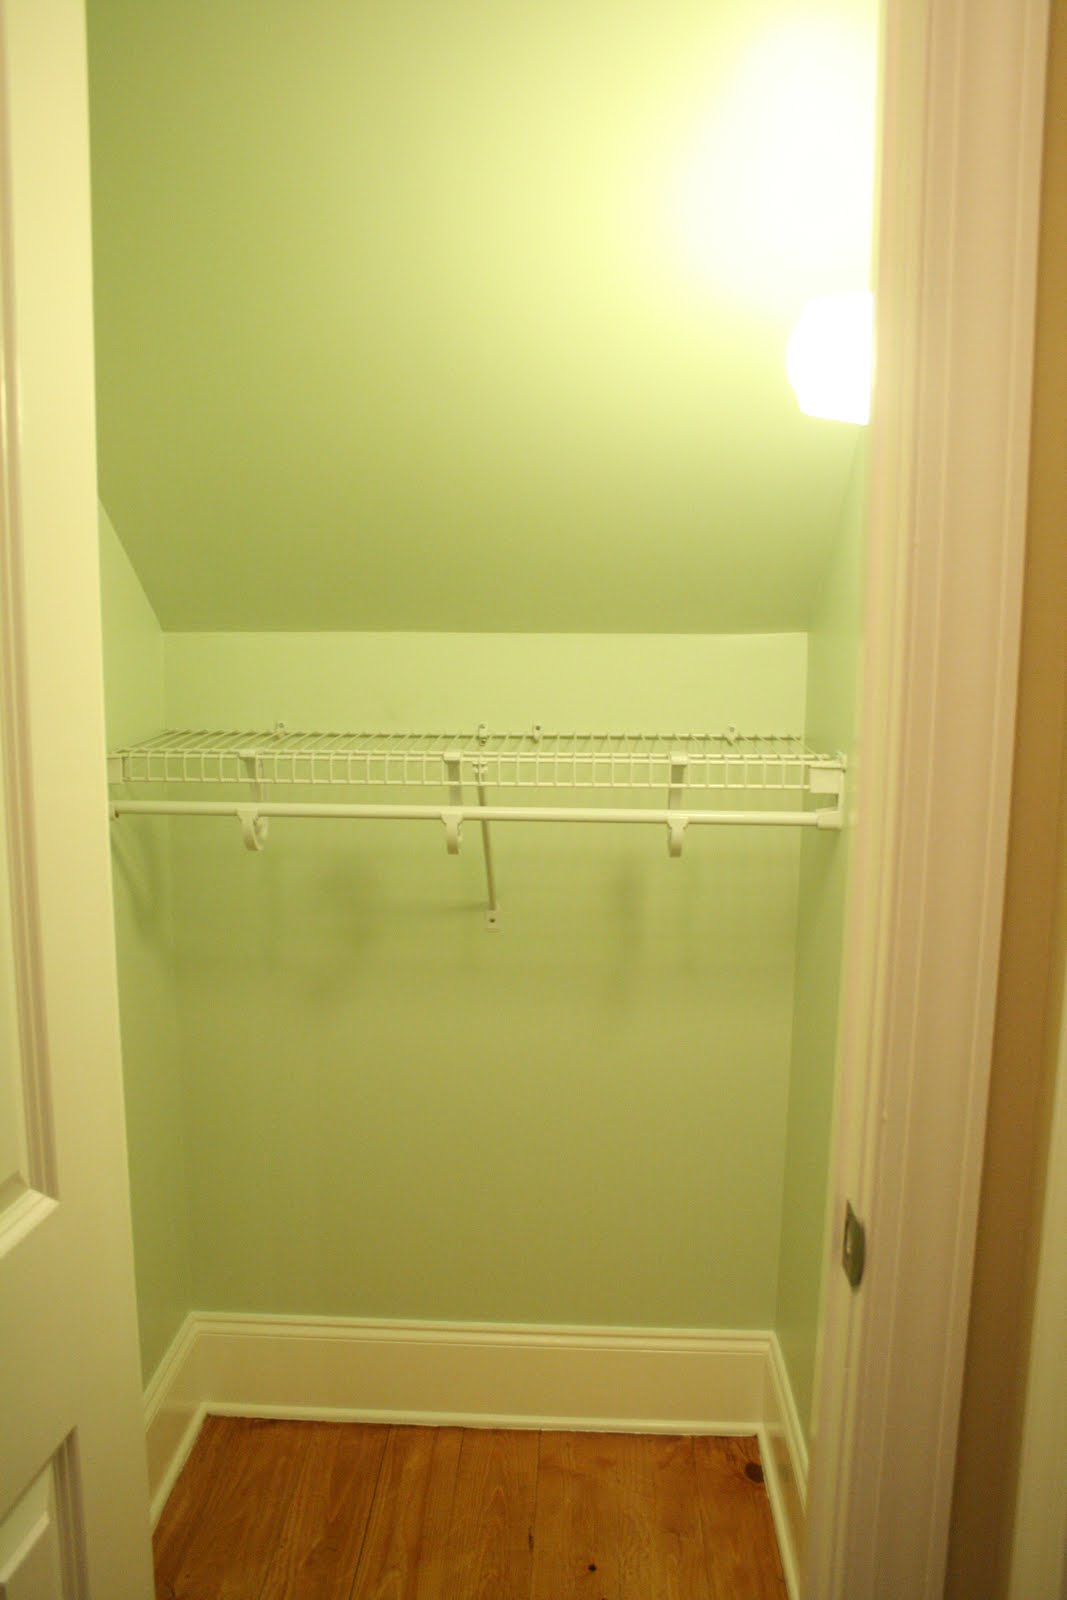
And added shelves.

I have a love/hate relationship with the toy closet. I love it because it keeps the living room from looking like a preschool and gives me a place to shove everything when I'm in a hurry to pick up the house. I hate it because no matter how hard I try it always seems to end up looking like this.

I've been focusing on gaining control over Max and Lily's clothes and toys. I've been inspired to organize these spaces in both beautiful and practical ways. I'm hoping that if the organization is beautiful I will be motivated to keep it organized.


First, I cleared everything out and used wrapping paper to "wallpaper" the closet. There is not a lot to the process. I used a measuring tape to measure each cut and my cutting mat and rotary cutter to make the cuts. The job would have been much more difficult without these tools. I started out using Mod Podge to apply the paper and quickly realized that was not the way to go. After a little Google search, I decided to use spray adhesive to apply the paper to the wall. If you plan to take on this project spray adhesive is your best friend. Once all of the paper was up I used two coats of Mod Podge to protect the paper. Originally the paper did bubble, but after about 24 hours they were mostly gone. The "wallpapering" job is not perfect, but I am happy with the results.
While the paper was drying I sorted, purged and assessed the toy situation. I tried to think about where it would make the most sense to store each type of toy. Small Legos are now located in Max's room because the pieces are too small for Lily to play with and I moved the train stuff from Max's room to the toy closet because both Max and Lily can play with it. The toy closet is actually the closet that is formed from the space under the stairs and is in the little hallway that connects the living room to Lily's room. Since her room is so close to the main living area most of her toys (baby/girlie) are now stored in her room. I decided that the best use of the closet would be for shared toys and arts and craft supplies. I once tied magic markers to the ceiling fan and turned it on...I don't want my children to recreate this scene. Also stored in the closet are Duplo Legos, Lincoln Logs, Mr. Potato Head, cars and games. We also sent a bag of toys to Goodwill.


Today I used my extra few minutes to paint the faces of the shelves with chalkboard paint. I haven't written on them yet because I have to wait 24 hours for it to cure. I actually like the look of the shelves before they were painted, but I'm hoping to avoid Marcos' duct tape treatment.

Other than that, I used what I had and bought a few storage containers from Target.


What methods do you use to keep your difficult spaces organized?


I'm linking up!



IHeart Organizing

Wednesday, October 20, 2010

Spooky Wreath


This is another project from last year. I took an old, faded out spring wreath and with a little spray paint, spider webs and spider rings turned it into a "spooky wreath" (imagine me saying this in a very "spooky" voice and it is way cooler).

Before

Here's the wreath after a good coat of black spray paint and my baby showing off our supplies.


Max helped me attach the webs and stick in the rings and we were good to go. Gotta love a quick and easy before and after!


Everything's Cuter with a Little Paint

I completed this project over a year ago as a birthday gift for a dear friend of mine. It was such a fun project because it involved a few of my favorite things: turquoise, my paint sprayer, chalkboard paint and twine. I am a firm believer that anything can be made cuter with a little paint and ribbon. I will eventually paint or tie ribbon on anything that sits still long enough!
After

Before

I originally bought this old window at an antique store for $5 and it had been sitting in my garage for quite a while. First, I removed the glass panes. Then I scraped and sanded all of the loose paint. I then primed the window with an oil based primer (not many progress shots, sorry!). Next, I loaded my paint sprayer with my mis-tinted Wal-mart paint and sprayed the window. When the paint was dry I distressed the wood slightly and applied glaze.

The nice man at Lowes measured one of the glass panes that I had salvaged from the window and perfectly cut me 6 wooden panes. I came home, spray panted the panes with chalk board paint and popped them into place. I secured them into place with a small amount of wood glue, but it may be necessary to add a few small nails to keep the new panes in place.

When everything was dry I tied some twine around the window, added a little piece of chalk and a birthday message and I was ready to party!

Sunday, February 28, 2010

Blogging Again and Max's New Map Room


As Luigi would say, "I'm-a-back!" (Yes, I have a 4 year old, a husband and a Wii.) I would like to say that I have accomplished a lot over the past 5 months, but other than growing a little girl in my tummy, keeping up with a 4 year old and "completing" said 4 year old's Map Room I haven't accomplished much. I am excited to be back at blogging. I want to be able to use the blog as a way to document our lives and I hope I can keep it up this time. We'll see...

I am excited to share Max's new room. I started working on this project over Christmas break and last night I finally "finished" it. There is still much to be done in here, but it is good enough for now!

Our house has 2 bedrooms downstairs (including the master) and 3 bedrooms upstairs. Marcos uses one of the upstairs bedrooms for his office, I use another for the guest room and "my room" and, until recently, the other has been use for storage of baby stuff and other "stuff" we didn't know what to do with. Max has been downstairs with us. The news of Little Lily made us realize that it was time to move Max to the upstairs room. The problem? We had to make Max think this was a good idea...a little bribery never hurt! Talk of a cool new map room had him convinced!

This is what the room and closet looked like as the "we-don't-know-what-to-do-with-this" headquarters of the house.


Closet & Stuff


Cleaned-out Closet (don't ask me where the stuff went!)


Baby Furniture


The new view from the door. I decided to use the dresser that we used for Max's changing table in his room. This may mean that Lily won't have a changing table (did I mention that we are having a little girl in May and that her name will be Lily?). The globe is a Goodwill find and I think it is cool as ice.

(I don't have any progress shots--believe me, you don't want to see them anyway!)


Max's bed...I am still trying to decide on "art" for the walls. I have never been very good at hanging things on the wall.


This side of the room still needs a lot of help, but like I said, it is good enough for now!


This is a very old school desk that I refinished. I love the way that it turned out and I think that it makes the perfect bedside table for Max.


Max would be upset if I didn't point out his favorite item in the room--his orange lamp. My child loves all things orange.


The chalkboard wall in his closet is also one of his favorite parts of his new room.

I am happy to report that his transition to his new room has gone smoothly.
Now if I can only finish Lily's room by May!

Saturday, September 5, 2009

Today's Progress

Marcos had to do some work out of town today and I wanted to surprise him with a completed shed. We have wanted a storage shed for quite a while and completing the room over the garage forced us to find a place to store all of the "stuff" that was stored up there. The shed has also enabled us to gain some much needed space in our garage. Who knows, maybe I'll be able to park my car in there one day. Marcos built the entire shed himself and it has been sitting there for over a month waiting to be painted. I don't have any progress shots, but here is what the shed looked like when I started painting yesterday.


I painted the door black and hung a red star that I stole from Max's cowboy room on the door--this led to a huge melt-down. Max hates change and there is no reasoning with him--I offered him a Popsicle and reminded him that we are going to redecorate his room. My little bribe didn't work--he...wants...the...star...back! He's not getting it back!


Marcos is not home yet, but I think he will be excited. Now he just needs to add the roof and the light and this will be one project that we can mark off the list.

This shed is going to solve more than one problem...

I love my husband and I am proud of his business, however, I do not love the mess that comes along with his chosen trade. There are pipes and back flow stuff and he also has an issue with collecting wood. For a year all of this has been up against the back of my house. Thanks to the shed it will be gone:-)

The space between the back of the shed and the fence will serve as storage for all of his crap, I mean stuff. I think he should put brick or pavers down to cut down on weeds and bugs.

He will also install trellis so that all of this stuff is finally out of view! I will be sure to keep you updated on his progress.

Sunday, July 19, 2009

Office Redo-Sneak Peek

I spent the entire day yesterday listing a bunch of stuff on Craig's List--hoping to get things cleaned out and organized (and maybe make a little $$ in the process)! I'm not sure if I was really motivated to get the stuff listed or if it was another tactic that I used to put off completing the office redo. If I don't finish soon my husband is seriously going to kill me. He told me (in a Brazilian accent), "Cooley, I want my office back!". I better get on it! What's his problem? At least he has a finished bathroom! I enjoy painting (strange, I know) and I think I have become pretty good at it. However, I am VERY slow--it drives Marcos crazy. He says I don't need to spend so much time on the details, again in a Brazilian accent! Anyway, I do have plans to finish the office just as soon as I finish listing all this stuff on Craig's List. In the meantime, I am going to walk you through the before pictures and give you a little taste of what is to come by showing the office bathroom afters. Here we go...

This is Marcos' attempt at decorating his office. He loves his office and I have to admit that this one is much better than the office we had at our last house. It seems like all the left over furniture gets put in the office--thankfully we needed more furniture in out last house than in this one so we were able to use some of the "good stuff" in the office this time. The desk is Pottery Barn--Marcos bought it from a client a few years ago for a great price. It needs to be cleaned up, but over all it is nice. My mom gave him the black office chair for Christmas. Don't even get me started on those curtains (Marcos loves them? But I have a great solution and I've already hidden the curtains so Marcos won't put them back up when I'm not home!)


My husband is a landscape designer and a very talented artist. His drawing desk serves its purpose, but the chair needs some help. The brown chair is also Pottery Barn and was purchased from the same client that Marcos bought the desk from. Marcos painted the canvas above his drawing table right after we got married and it is not my style (I like his drawings better than is paintings!), but there are some things you just don't mess with.

The large white buffet was in the formal living room at our old house and now serves a more useful purpose as book and office supply storage. The men on top are another thing that I know not to mess with. I will blame the clutter on the desk on my wonderful husband!


This black CD case is very useful and holds all of Marcos' CD cases--the CD's are all in CD holders? Men! The black chest was made by my grandfather and has been painted about a million times! The rug is also a transplant from our old house and needs a good cleaning.

This is the forgotten bathroom (as in it is upstairs and I often forget to clean it--scary!). I have plans to use Marcos' drawings to make this the "sexy" bathroom in the house.

The white shelf is from Max's nursery and the antique tools belonged to my grandfather--they will both stay.


This bathroom housed a mixture of items that we didn't have another place to put.

Now for the bathroom reveal...


The view from the office door:


Wall Paint: Valspar Satin color matched to Sherwin Williams Color--Steely Gray (I stole from Melissa)


Trim Paint: Behr High Gloss--Popped Corn


The details...


I hung the towel rods and toilet paper holder myself!


My grandfather's antique tools.

Personal touches:

Marcos' "sexy" drawings!

Built-in Shelves

I went with the "tool theme" and put all of our home repair books on the shelves.


I made the shower curtain out of a queen sheet set that I found on clearance at Target ($20 for the whole set!). The fuzzy rug came from TJ Maxx.

I hope you enjoyed the tour. If you have any ideas about what may need to be changed/added please leave a comment! Now I have to finish my Craig's List listings so that I can complete that darn office!